
Employee Onboarding collects a new hire's pre-employment documents before their first day, checks them, and creates their employee record from what you have already gathered.
Overview
The problem it solves is a familiar one: chasing documents over email, then re-typing the same details into Sprout HR by hand. Here the new hire uploads once through a secure link, you review what came in, and the employee record is built from those details rather than retyped from them.
Two roles interact with it:
|
Role |
What they do |
Where to look |
|
HR Admin |
Builds the checklist, invites the new hire, reviews and verifies documents, completes the employment details, activates |
Step-by-Step: First-Time Setup and Running an Onboarding |
|
New hire |
Accepts the privacy notice, enters their own ID numbers and personal details, uploads their documents — through a secure link and PIN, with no Command Centre account |
Step-by-Step: Completing Onboarding |
Supervisors are recorded against a new hire so you can see who they report to, but they are not emailed and have nothing to complete.
How It Works
Invite → upload → verify → activate. You invite the new hire, they upload their documents through a secure link, your team checks each one, and when you're ready you activate them — which is the step that creates their employee record in Sprout HR.
Verifying is not the same as activating. Verifying approves one document. Activating creates the employee record, and needs three things: the new hire's accepted privacy notice, your HR details, and every required document either verified or waived. Waiving is how you proceed for someone starting before all their papers are in — those items stay on your To-Dos until the real document turns up.
Two more things that catch people out:
- An upload isn't a submission. A document stays with the new hire until they press Submit, and they can pull it back with Unsubmit until your team verifies it.
- Nothing is compared for you. The new hire types their own ID numbers and your team reads the documents. Correct any mismatch on the activation screen, where the numbers stay editable until you activate.
Reminders
A new hire with a required document still outstanding is emailed 7, 3 and 1 days before their start date.
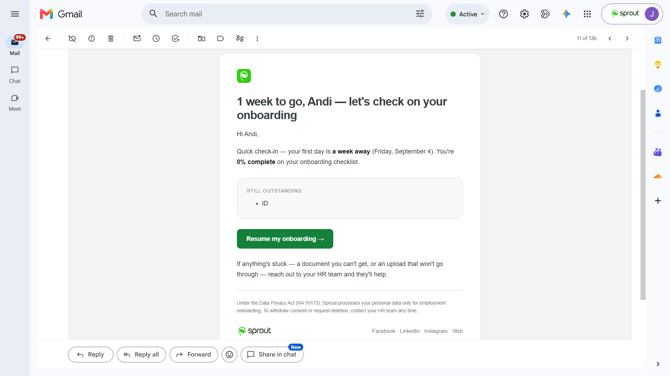
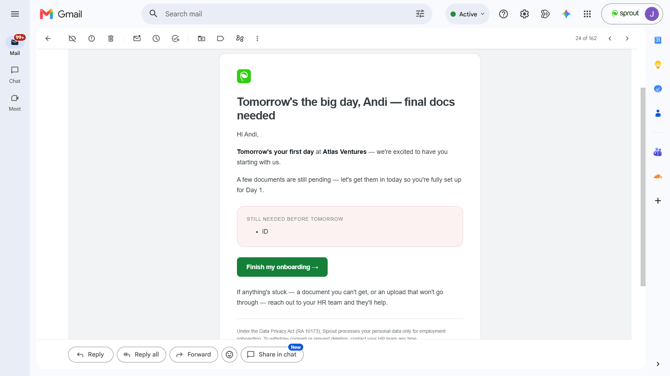
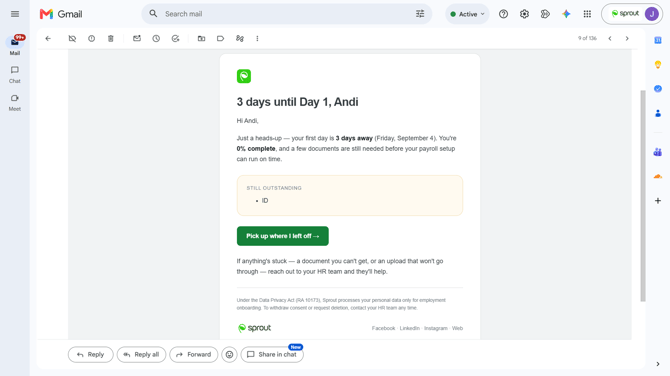
- Optional documents don't trigger one — nor do unfilled ID numbers or personal details, nor a document marked "I don't have this yet".
- It counts back from the start date, so someone invited three days out only gets the 1-day reminder.
- They stop at the start date, and don't restart if you later send a document back — that sends its own email with your reason instead.
Step-by-Step: First-Time Setup (HR Admin)
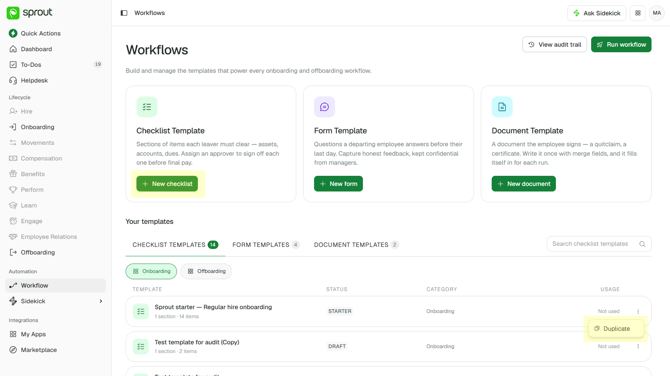
You need at least one published checklist template before you can invite anyone. Build it under Workflows, where everything you've made is listed under Your templates — filter the list by Onboarding to see only the ones that apply here.
- Start from the starter, or from scratch. Sprout starter — Regular hire onboarding comes preloaded. It's read-only, so open its ⋮ menu and Duplicate it for an editable copy — or choose + New checklist to build your own.
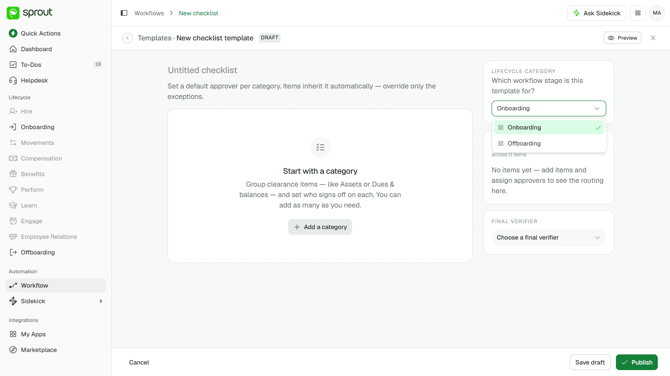
- Set the lifecycle category to Onboarding. It's in the right-hand panel and has to be set before you can publish. It's fixed once the template exists, so get it right at the start.
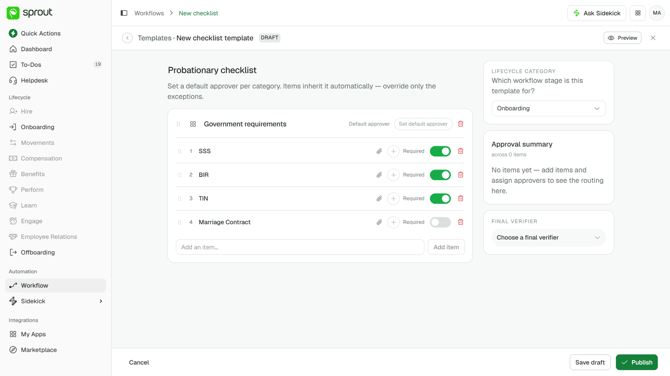
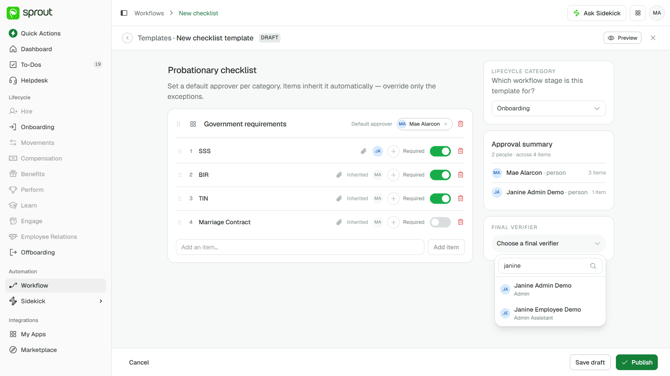
- Name the checklist — something you'll recognise in the dropdown at invite, like Probationary checklist.
- Add your items. Each one is a document you're asking for. Every item is Required by default; switch the toggle off for anything optional. Onboarding items always take an attachment, which is why each row shows a paperclip.
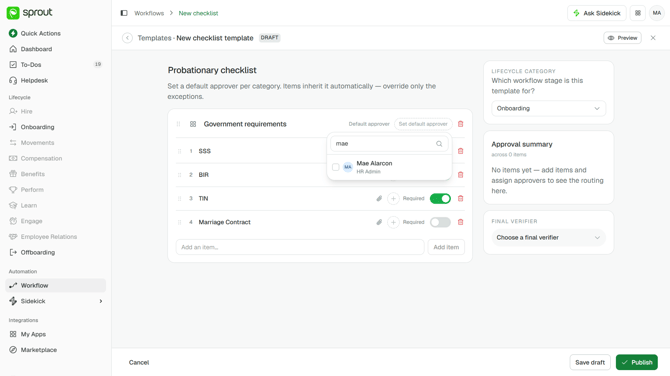
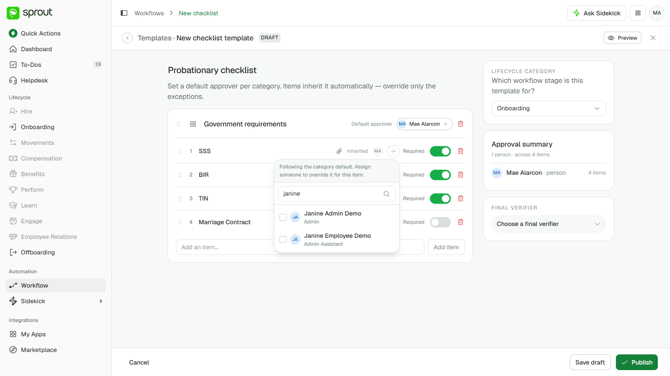
- Set who approves. Give the category a default approver and every item inherits it — then override only the exceptions by assigning someone on the item itself. Overriding adds a name rather than replacing one — the default approver can still sign off an item you've assigned to someone else. The Approval summary on the right shows who ends up responsible for how many items.
- Choose a final verifier. They can sign off any item, whoever else is named on it.
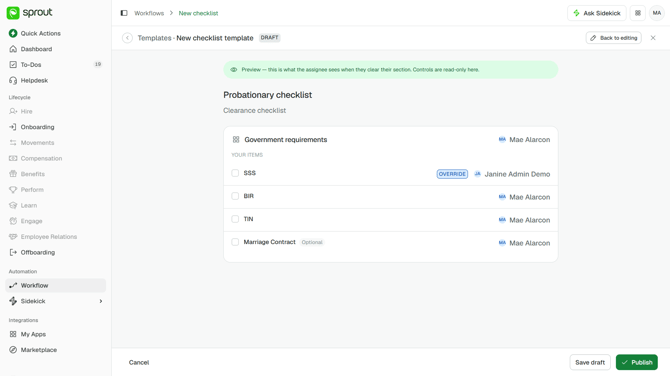
- Preview, then publish. Preview renders the checklist read-only, as it appears in use — Back to editing takes you back. Save draft keeps it unpublished; Publish makes it Active and selectable at invite. A template left in Draft can't be used.
Onboarding takes checklist templates only. The form and document templates sit alongside checklists in the library, but they belong to other processes — build one of those and it won't be selectable at invite. If different roles need different documents, build a checklist for each and pick the right one when you invite.
Your To-Dos (HR Admin)
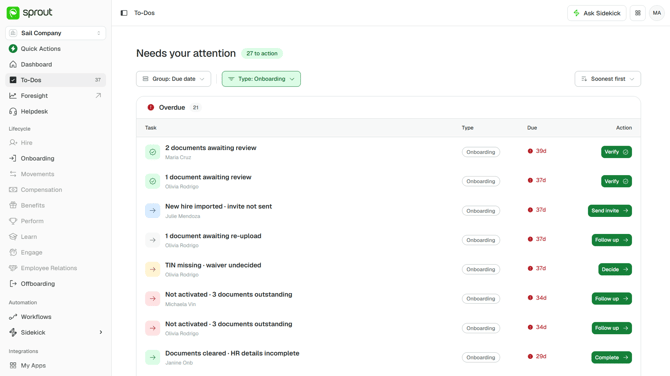
Onboarding follow-ups collect on To-Dos, near the top of the menu, so nothing depends on you remembering it. Every stage puts something there — a new hire imported but not yet invited, documents waiting to be reviewed, a missing ID number with no waiver decision, HR details still to complete, someone ready to activate, and documents still outstanding after activation. Each row takes you straight to where you act on it, and comes off the list once you have.
Collect is where waived documents resurface. Waiving defers a document rather than closing it, so the item stays on your list until the real document arrives, is verified and is synced. 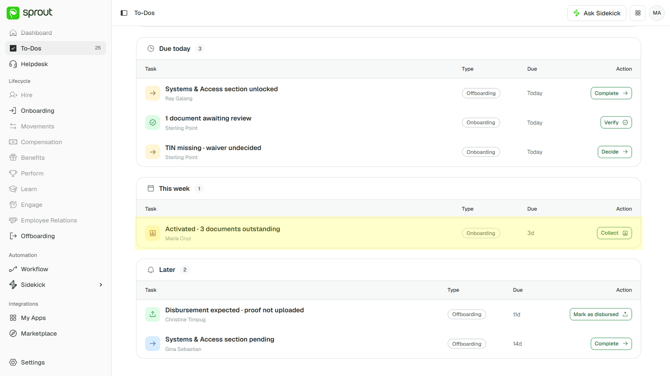
Known Limitations and Workarounds
|
Limitation |
Workaround |
|
No automatic checklist by role. Nothing reads a job title and picks a checklist for you |
Build a template per role and choose the right one at invite |
|
Progress emails go only to the new hire. Hiring managers get no automatic notification |
Supervisors are recorded on each record, so you can filter the list by department and share progress yourself |
|
Nothing is read off the documents for you. There's no parsing of what gets uploaded |
The new hire types their own ID numbers in the Government IDs section — that's what saves your team retyping them. And where a new hire came across from Teamtailor, the details it passes over arrive pre-filled on the activation page, so there's less to enter by hand |
|
A synced document can't be replaced from Command Centre |
Correct it in Sprout HR. And check before you sync — a later push only overwrites when the file name and type match exactly |
|
No bulk actions. Each document is verified, waived or flagged on its own — there's no select-all, and no bulk activate |
Flagging is the one thing that batches: flag as many as you like, then Send re-upload request goes out as a single email |
|
No self-serve history export. The audit trail is view-only here |
Contact Sprout Support and we'll produce a formal record for an investigation or dispute |
|
No re-collection of expiring documents. Anything needing periodic renewal isn't tracked here |
Track renewals outside the module — onboarding ends when someone becomes an employee |
|
No equipment or IT provisioning. Laptops, corporate email and similar aren't covered |
Keep those in your existing processes; this module ends at the employee record |
|
Philippines only. Document types and consent forms are PH-specific |
Handle non-Philippines hires through your existing process |
Getting Help
Questions about your template go to your Customer Success Manager. If something looks wrong, contact Sprout Support and tell us which new hire it concerns. Common questions are answered in Employee Onboarding — FAQs.
Got a question or need extra help? Sidekick makes it easy — get answers, raise a ticket, or schedule a call with our experts, all in one place.