
Step-by-step guide to creating an Individual Development Plan, adding development areas, action items, and sharing it with your manager without connecting it to a review cycle.
STEP 1: Navigate to Growth Path
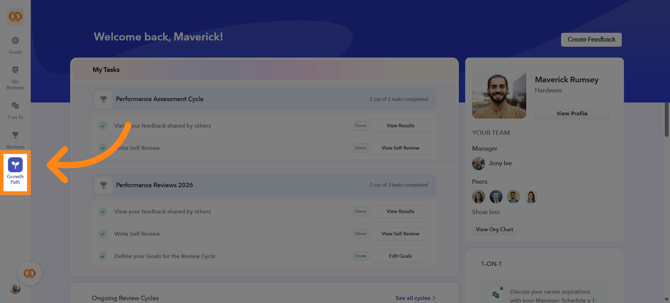
On the left side of the screen, you will see the list of modules available in Peoplebox. Click on the Growth Path module to start creating your Individual Development Plan.
STEP 2: Start Creating Development Plan
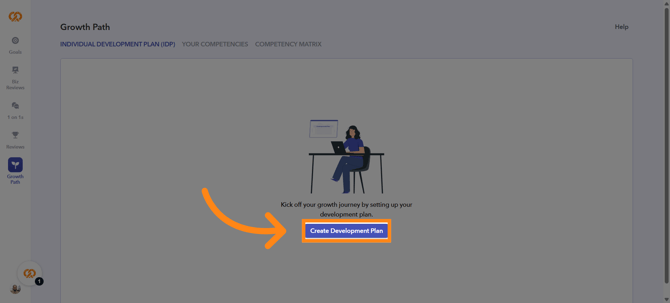
After clicking on the Growth Path module, the IDP screen will open. Click on the Create Development Plan button highlighted in blue to start creating it.
STEP 3: Choose any One Plan type
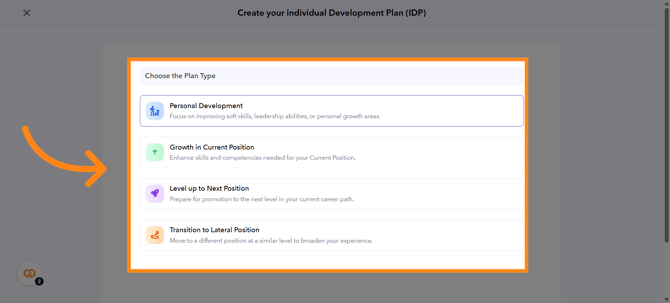
After clicking Create Development Plan, the Choose the Plan Type screen will open. Click on the plan type you wish to select.
Note
Example: A Personal Development Plan focuses on improving soft skills, leadership abilities, or personal growth areas.
STEP 4: Proceed to Next Step
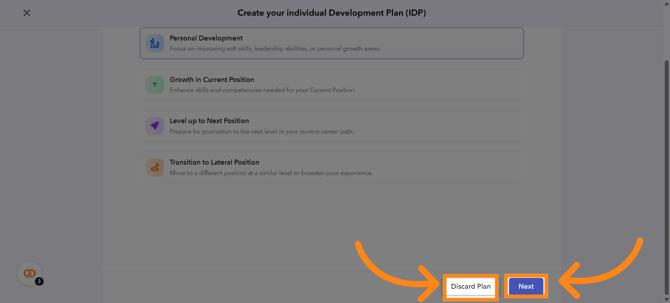
After selecting the plan, scroll down and click Next to continue. Click Discard Plan to cancel.
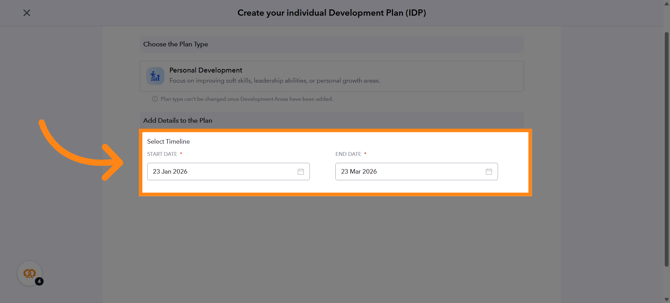
STEP 5: Select the Start Date and End Date for your IDP plan.
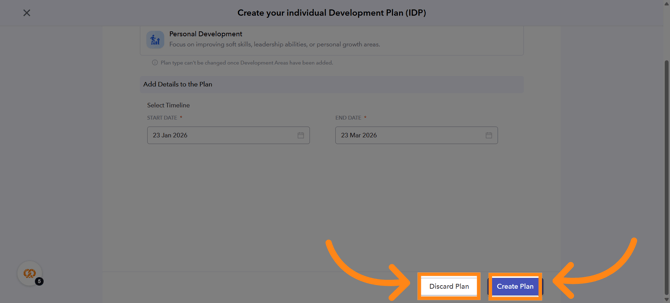
STEP 6: After selecting the Start Date and End Date, scroll down and click Create Plan to finalize your IDP. Click Discard Plan to cancel.
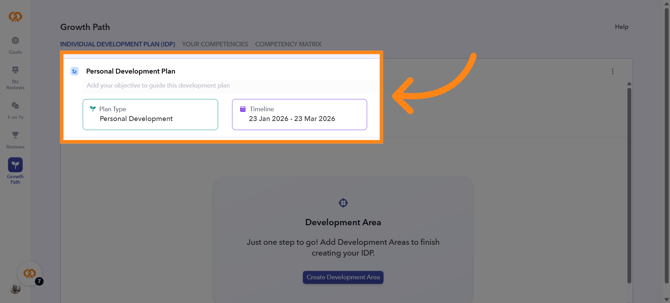
STEP 7: After clicking Create Plan, a success message will appear: Plan created successfully. You will then see your plan details including Plan Type and Plan Timeline.
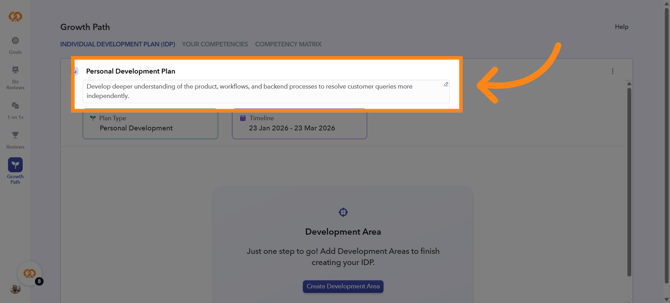
STEP 8: To include objectives in your plan, click the edit icon next to the text box under Personal Development Plan and enter your objectives.
STEP 9: Click the Create Development Areas button to start defining areas for your plan.
Note
Nova AI Suggested Development Areas feature is controlled by the admin. If enabled, an additional button will appear.
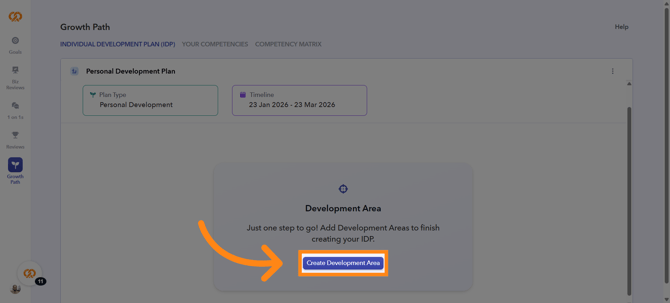
STEP 10: Choose from three types: (1) Goal-Linked for goals below target; (2) Competency-Linked for competencies needing improvement; (3) Freeform for custom action items without linking to any goal or competency.
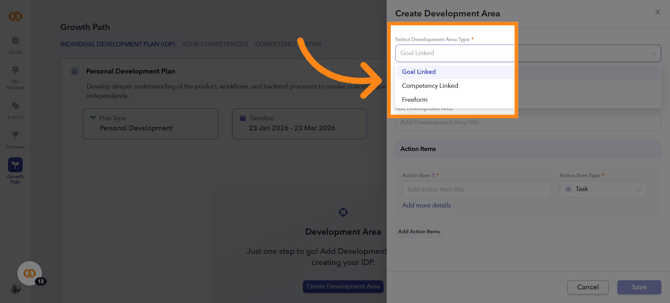
STEP 11: Linking Goal to a Development Area
Choose Goal-Linked as the Development Area Type. Under the Select Goal field, enter the name of the goal you want to add.
Note
Only one goal per development area. Create a separate area for each additional goal.
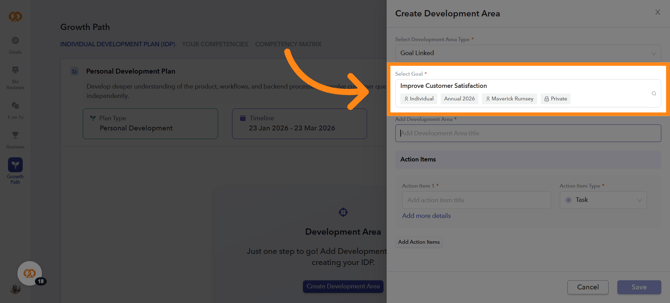
STEP 12: Assign a name to your development area.
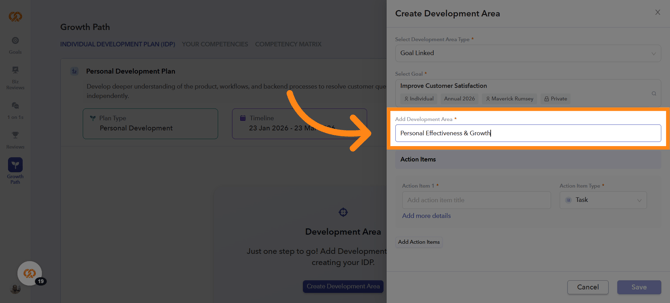
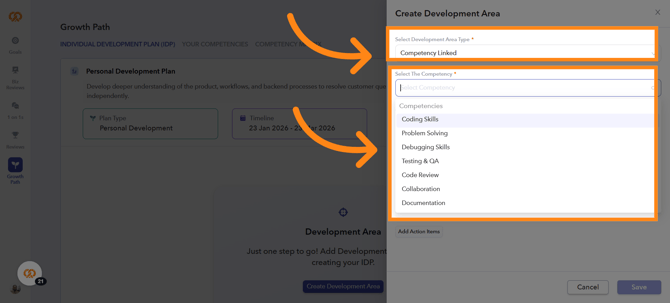
STEP 13: Linking Competency to a Development Area
If you choose Competency-Linked, a list of competencies assigned to you will appear. Select one competency to associate with your development area.
Note
Only one competency per development area. Create separate areas for additional competencies.
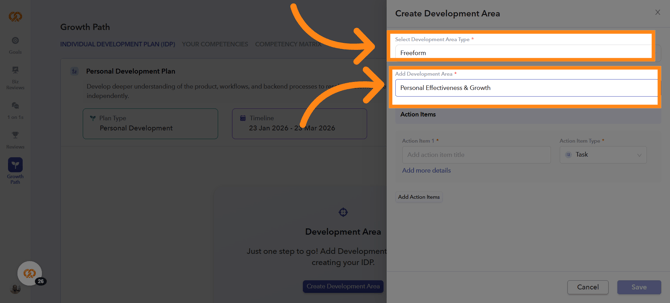
STEP 14: Creating a Freeform Development Area
Select Freeform as the development area type to create custom action items without linking to a goal or competency. Enter the name for your development area.
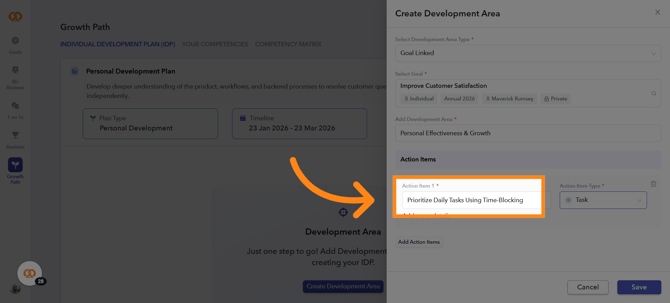
STEP 15: Creating action items for a Development Area
Under the Action Items field, enter the name of the action item in the Action Item 1 field. You can add multiple action items to a single development area.
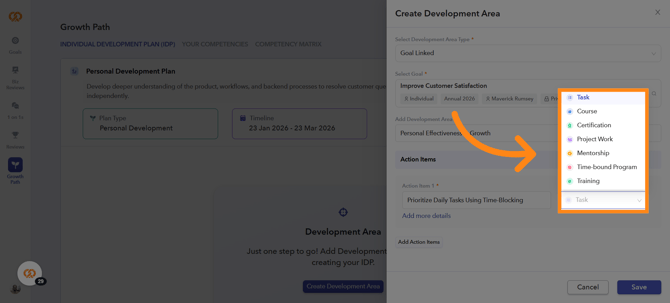
STEP 16: After entering the action item name, select the type from the Action Item Type field.
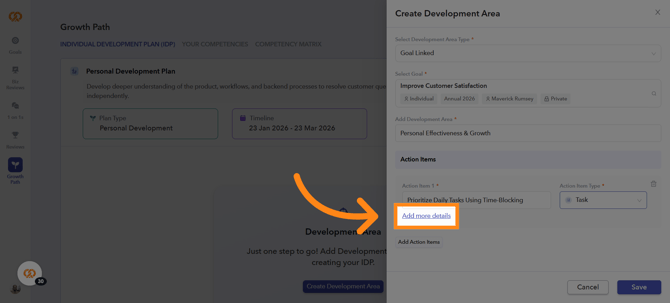
STEP 17: Click Add More Details to provide further information about the action item.
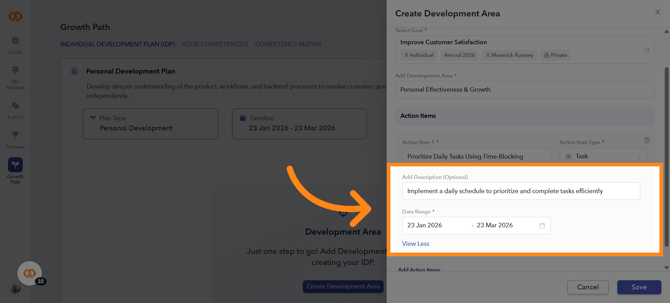
STEP 18: After clicking Add More Details, an Add Description section will appear. Add a description or leave it blank. You can also modify the date range.
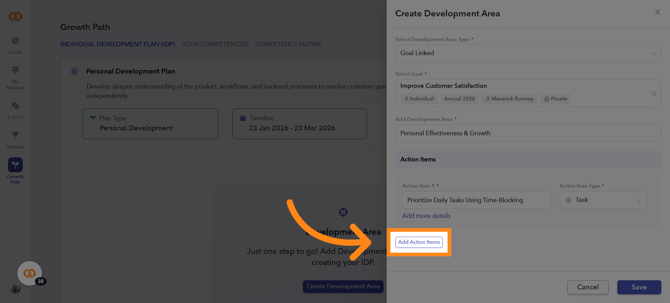
STEP 19: To include additional action items, click Add Action Items. This allows you to create multiple action items under the same development area.
STEP 20: When adding an action item with type Course, Certification, Training, Time-Bound Program, or Project, the system will prompt you to select a Progress Type.
Note
The progress type defines how the item is measured.
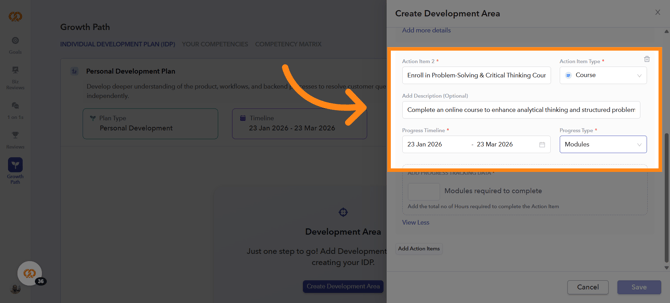
STEP 21: Select a Progress Type: Modules, Hours, Days, Weeks, or Months. Choose what best fits your action item.
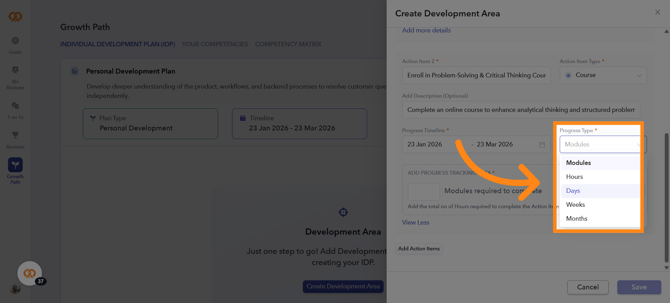
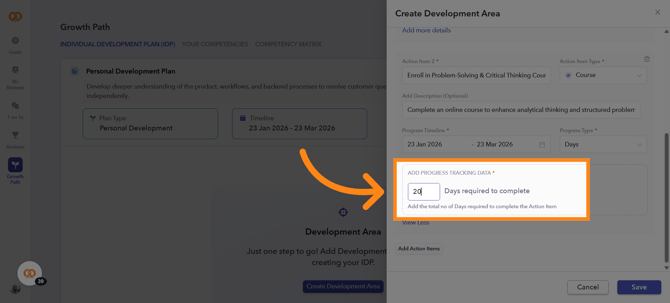
STEP 22: After selecting a Progress Type (e.g., Days), enter the number of days required to complete the action item.
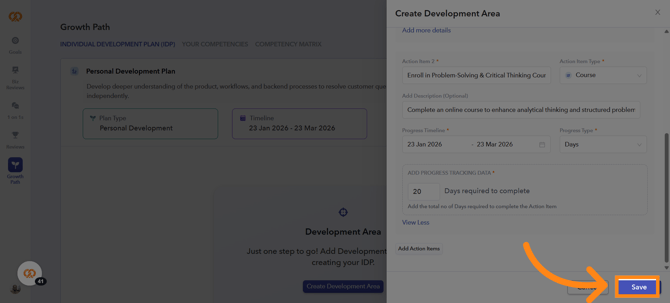
STEP 23: After creating all action items, click Save to store the development area along with its associated action items.
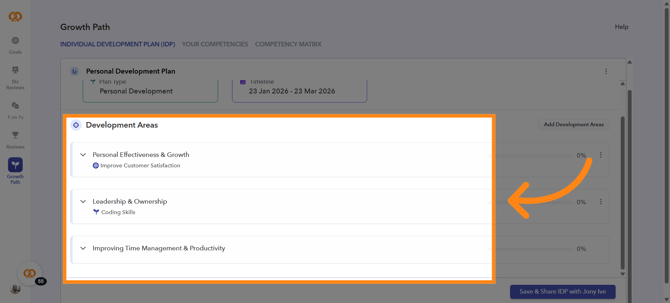
STEP 24: After saving, a success message appears. View your development areas with linked goals/competencies and action items with their targets. Click the dropdown icon near the development area name to expand and view action items.
STEP 25: You cannot update action item progress until the IDP is shared with your manager. Once shared, progress updates become available for each action item.
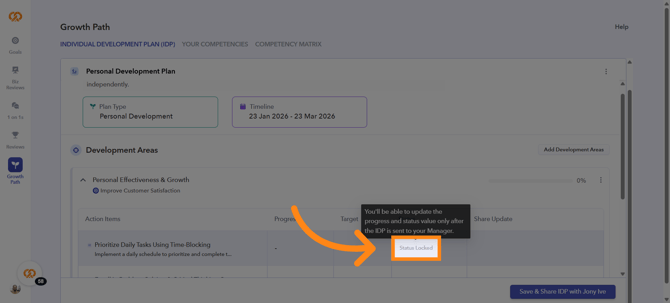
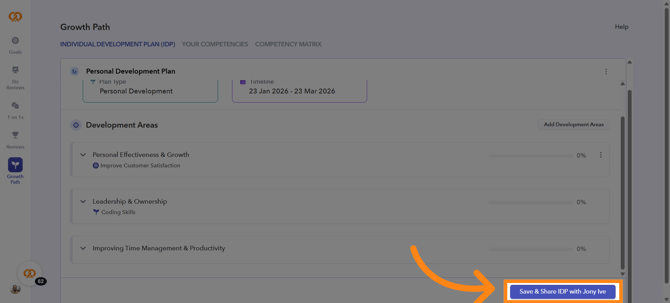
STEP 26: Once all development areas are created, click Save & Share IDP with Your Manager to share the plan and unlock progress tracking.
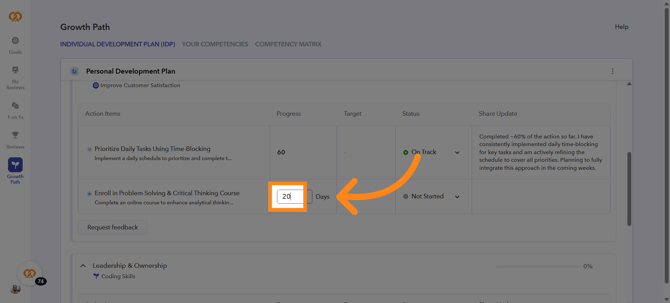
STEP 27: Once shared, a success message appears indicating the plan is now active. Select a development area and choose the action item to record a check-in for. Under the Progress column, enter the progress value.
Note
The progress field displays the progress type unit (e.g., Days).
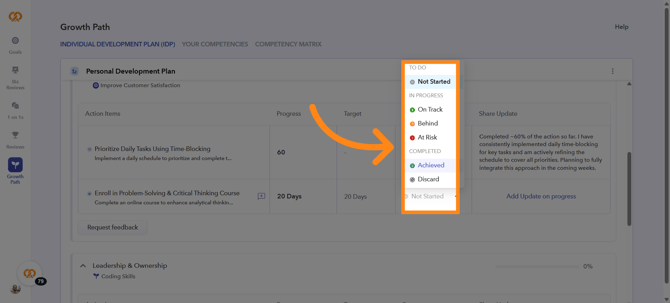
STEP 28: After updating the progress value, update the status of your progress. Under the Status column, select the appropriate status based on your progress.
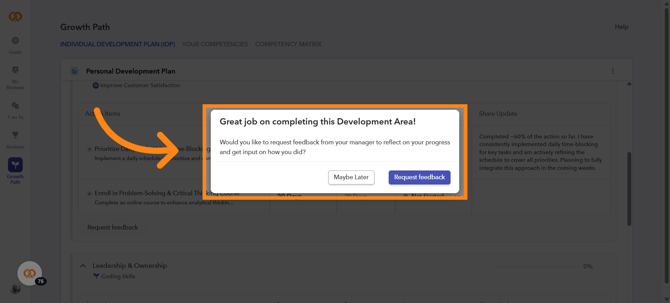
STEP 29: If the development area is Achieved, a dialog box will appear asking whether you would like to request feedback from your manager. Choose Request Feedback or Maybe Later.
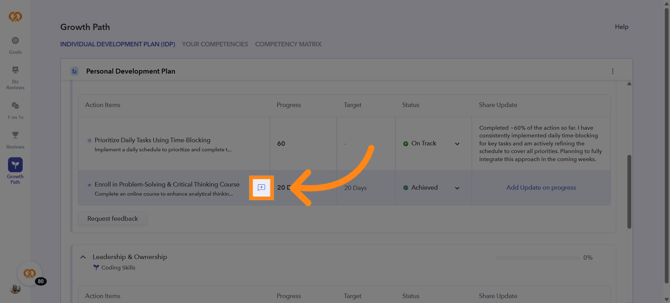
STEP 30: To view activities related to a specific action item, click the comment box icon next to the action item name to see all activities associated with your development plan.
Want real-time responses? Explore Sidekick, your 24/7 guide for product inquiries!