
Hubstaff now integrates with Zapier to improve productivity by automating the way you work. Zapier is an integration hub that allows different products to talk to each other and automate actions across both platforms.
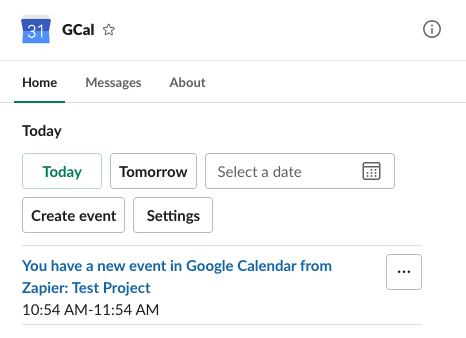
A sample calendar entry created by a Zapier Zap in Google Calendar when a new project is created in Hubstaff.
There are two ways you can use our Zapier integration: Export triggers are actions from Hubstaff that trigger an event in another app. Import triggers are actions from another app that triggers an event in Hubstaff.
Export Triggers
Slack
Get Slack alerts when employees are late, miss, or abandon a shift
This feature works with Hubstaff Schedules and is available on Team plans and up.
Step 1
On your Zapier homepage, click on Make a Zap/Create Zap.

Step 2
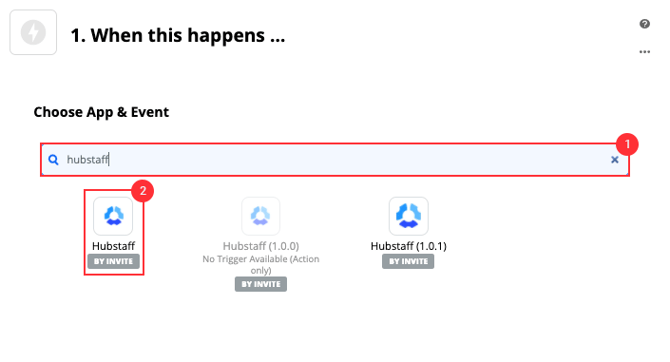
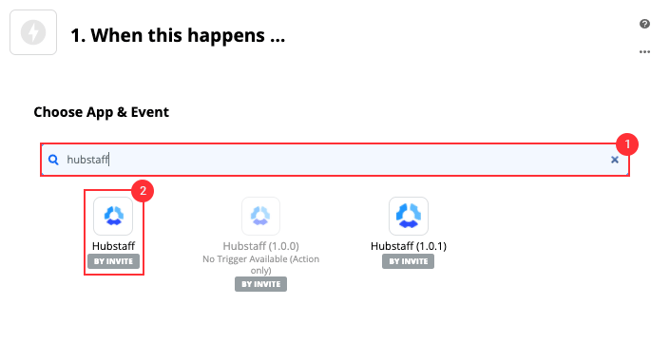
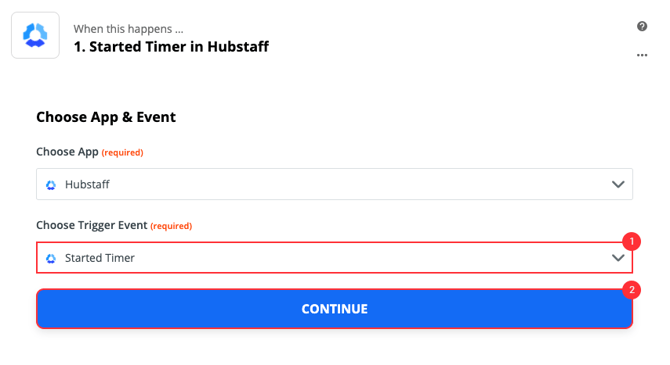
On the Choose App & Event field, type in Hubstaff then choose Hubstaff from the available options below.

Step 3
Choose a trigger event, then hit Continue.
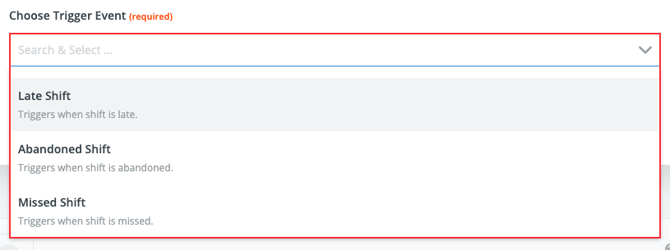
For attendance notifications, select one of the following options:
- On-time Shift
- Early Shift
- Late Shift
- Abandoned Shift
- Missed Shift
Step 4
Select the Hubstaff account you wish to use.

Step 5
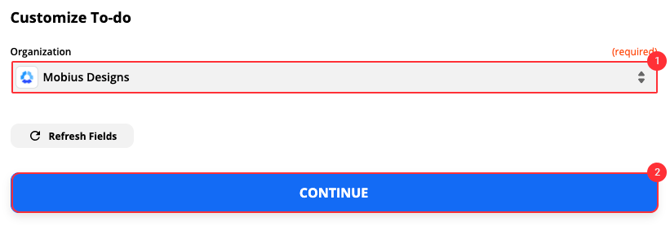
Select the Hubstaff organization.

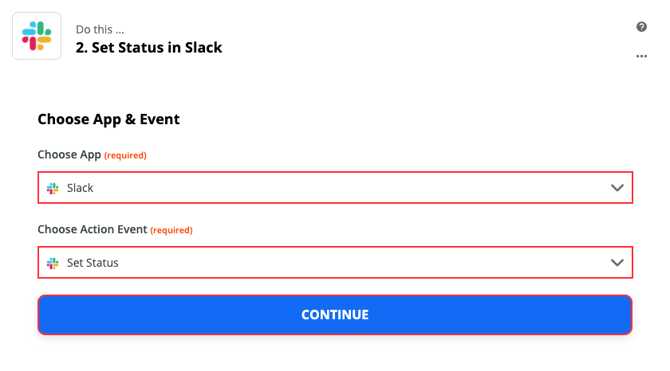
Step 6
Select the Slack app, then choose an Action Event. On the Action Event drop-down, you can choose to send a direct message to a Slack user, or send a message to the entire Slack channel.
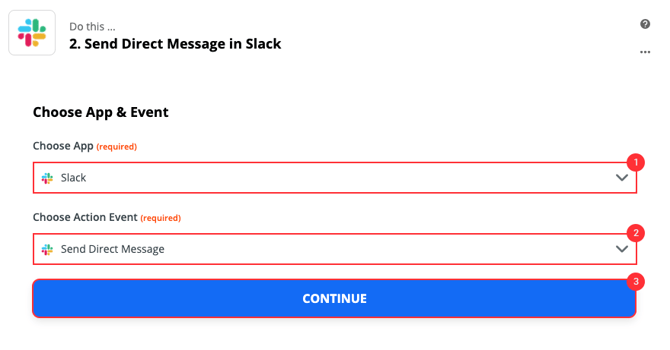
Step 7
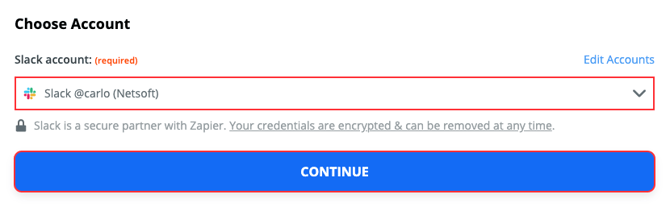
Choose your Slack account.

Step 8
Fill in only the required fields, or fill out the entire form field depending on how you’d like the trigger to work. Click the Continue button when finished.
Required fields:
- Username – the Slack user who will receive the notification.
- Message text – the message that will be sent to the selected user.
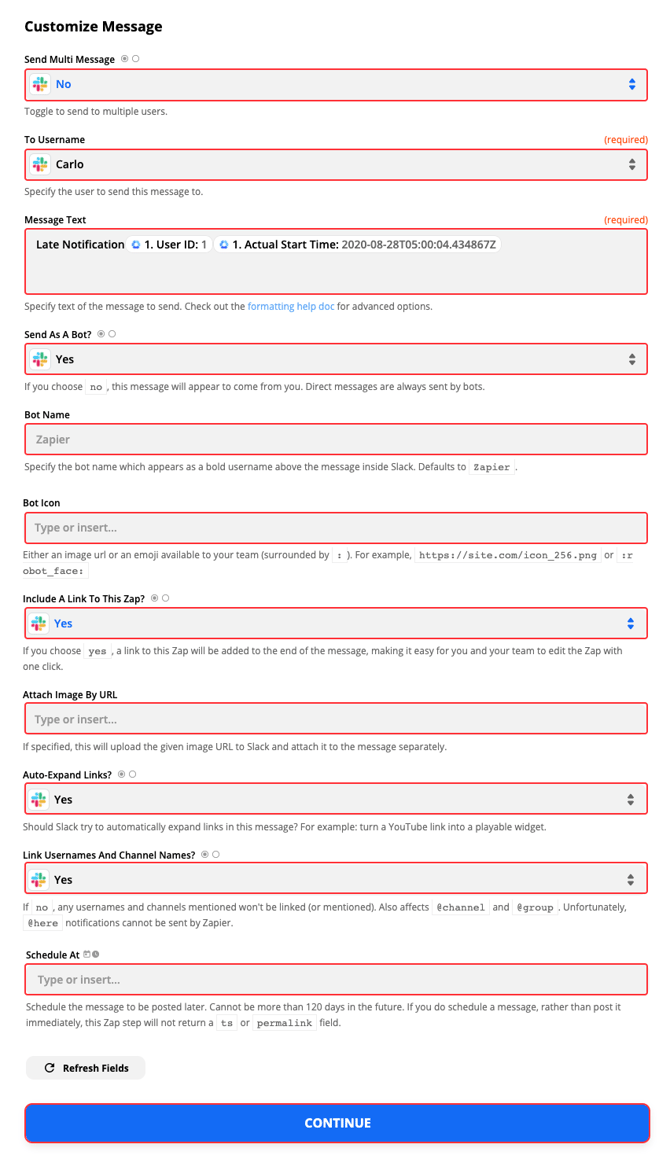
Click Test and Continue and then Turn on Zap to finish the setup.

Step 10
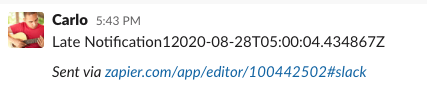
An attendance notification will be posted on Slack depending on your settings.
Send Slack messages when to-dos and tasks are completed
Step 1
On your Zapier homepage, click on Make a Zap/Create Zap.

Step 2
On the Choose App & Event field, type in Hubstaff then choose Hubstaff from the available options below.
Step 3
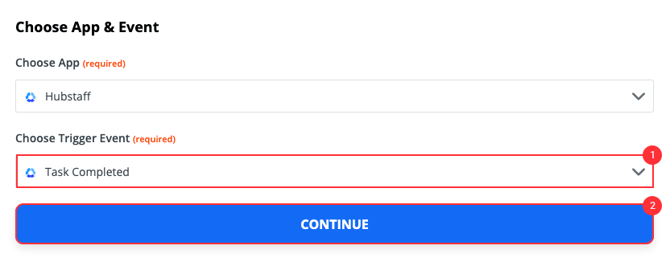
From the Trigger Event drop-down, choose Task Completed, then hit Continue.
Step 4
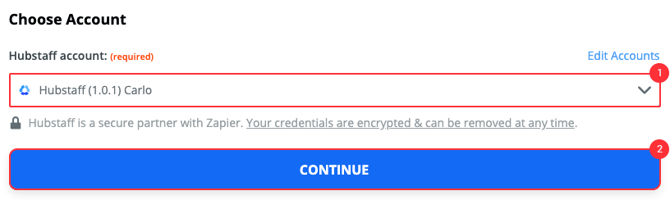
Select your Hubstaff account.
Step 5
Choose your Hubstaff organization.
Step 6
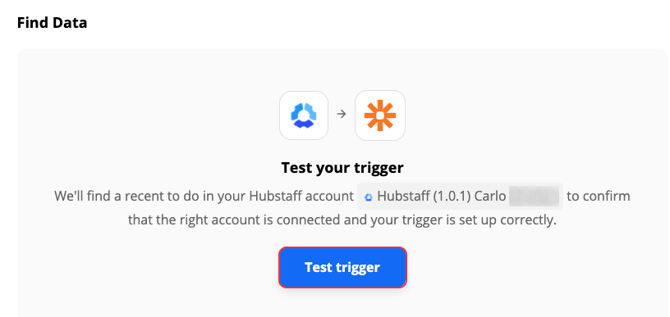
Test your trigger, then hit Continue when done.

Step 7
Choose the Slack app and either choose the Send Direct Message option or the Send Channel Message option.

Step 8
Choose your Slack account.

Step 9
Fill in only the required fields, or fill out the entire form field depending on how you’d like the trigger to work. Click the Continue button when finished.
Required fields:
- Username – the Slack user who will receive the notification.
- Message text – the message that will be sent to the selected user.

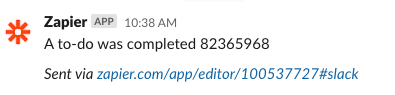
A notification will be sent to Slack when a to-do or task is marked completed.
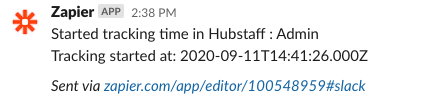
Send Slack messages when the timer is started or stopped
Step 1
On your Zapier homepage, click on Make a Zap/Create Zap.
Step 2
On the Choose App & Event field, type in Hubstaff then choose Hubstaff from the available options below.
Step 3
On the Choose Trigger Event section, select either Started Timer or Stopped Timer.

Step 4
Choose your Hubstaff account.

Step 5
Select the Hubstaff organization associated with this action.

Step 6
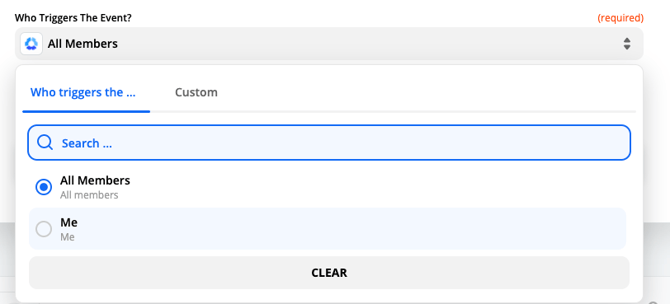
On the Who triggers the event section, select either Me or All members.
- Me – action is triggered when you start/stop the timer.
- All members – action is triggered when any user in your organization starts tracking time.
Step 7
Test the trigger, then hit Continue.

Step 8
Choose the Slack app, then an Action Event. This can be a direct message to a Slack user or a message for an entire Slack Channel.
Step 9
Choose your Slack account.

Step 10
Fill in only the required fields, or fill out the entire form field depending on how you’d like the trigger to work. Click the Continue button when finished.
Required fields:
- Username – the Slack user who will receive the notification.
- Message text – the message that will be sent to the selected user.

Step 11
A notification will be sent to Slack based on your settings.
Set the Slack status when the timer is started
Step 1
On your Zapier homepage, click on Make a Zap/Create Zap.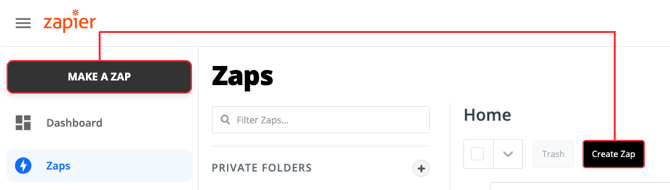
Step 2
On the Choose App & Event field, type in Hubstaff then choose Hubstaff from the available options below.
Step 3
On the Choose Trigger Event section, select either Started Timer or Stopped Timer.
Step 4
Choose your Hubstaff account.

Step 5
Select the Hubstaff organization associated with this action.

Step 6
On the Who triggers the event section, select either Me or All members.
- Me – action is triggered when you start/stop the timer.
- All members – action is triggered when any user in your organization starts tracking time.

Step 7
Test the trigger, then hit Continue.
Step 8
Choose the Slack app, then an Action Event. This can be a direct message to a Slack user or a message for an entire Slack Channel.
Step 9
Choose your Slack account.
Step 10
Enter the Slack Status Text. This will appear as the user’s status in Slack once they begin/end tracking time. Optional: set a Slack Emoji and an Expiration Time. Hit Continue once you’re done with the settings.
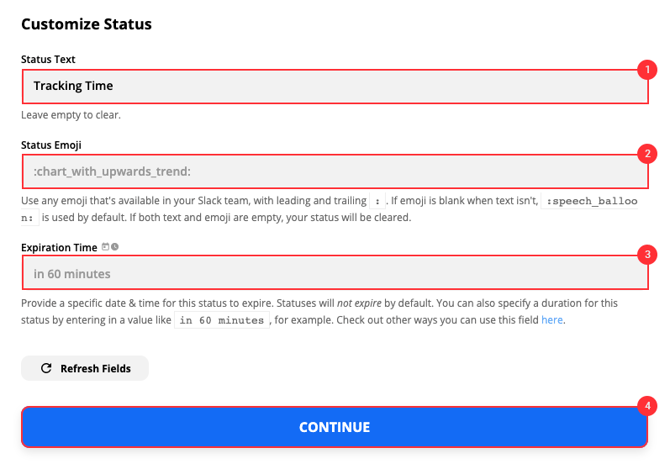
Slack statuses have a 100 character limit. Please make sure the custom status message meets this limit, otherwise the status will encounter an error and will not be posted.

Step 11
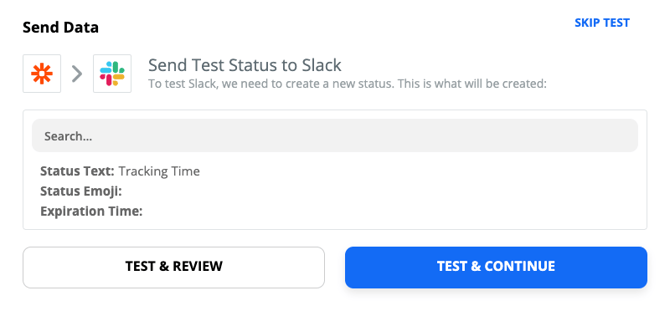
Click Test and Continue or Skip Test if you don’t wish to test your zap, then turn on the Zap.
Step 12
Once a user starts or stops tracking time depending on your settings, the Slack status will change.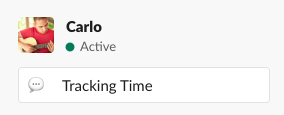
Want real-time responses? Explore Sidekick, your 24/7 guide for product inquiries!