
The Work Location Module enhances location management by introducing categories like Branches, Offices, and Warehouses for better organization. It reduces manual effort by auto-populating Address, Longitude, and Latitude fields, ensuring accurate data.
This guide will help you quickly add and edit locations and labels to streamline workflows and location data.
Accessing the Work Location Module
Once the feature is enabled, and you already have access to the current Locations module, you should also be able to have access to the Work Location Module.
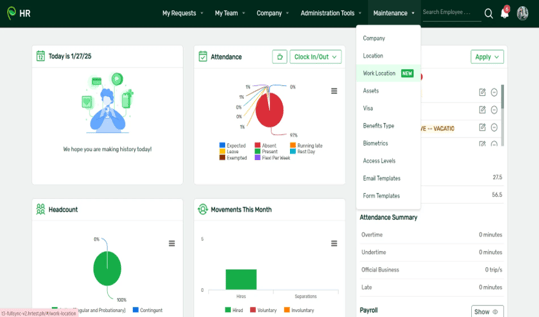
Simply go to Maintenance → Work Location in the Navigation Bar.
Adding Work Locations
- Go to the top right portion of the page and select Add Location
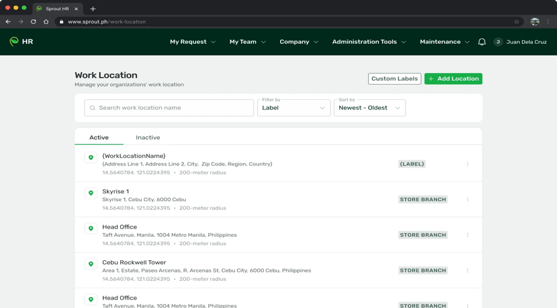
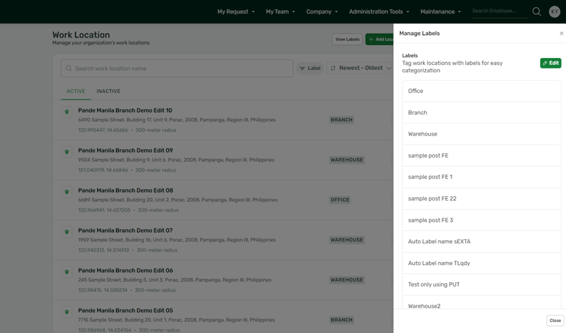
- A list of all locations under your account will be displayed, similar to the current Location page.
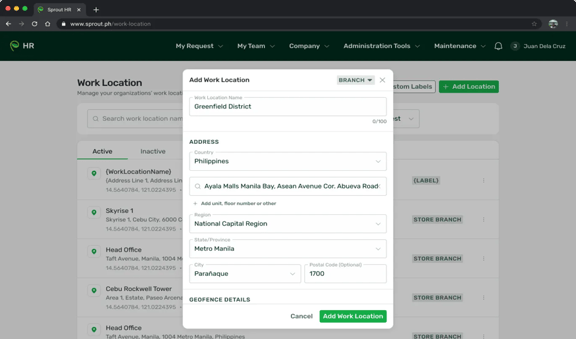
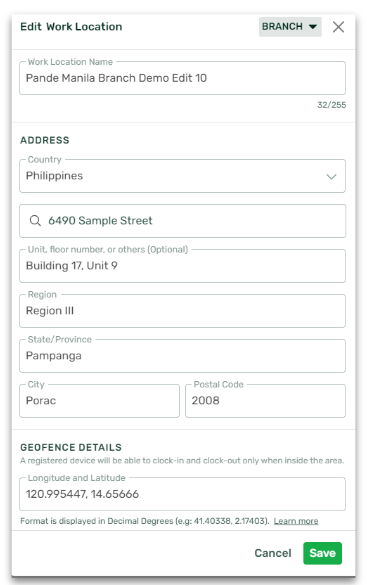
- Once the Add Location button is selected, a modal will pop-up.
- Simply enter your Location details: Work Location Name, Country and Radius
- For the Address field, search the relevant address and select from the dropdown. If your address does not appear, you may input your details manually.
- Once the address is selected, the following fields will auto-populate: Region, State/Province, City, Postal Code, and Longitude and Latitude
- Double check that all entries are correct. You may override the auto-populated fields if needed.
- On the top right, select the corresponding Label for your location.
- Select "Add Work Location" to Save.
Editing Work Locations
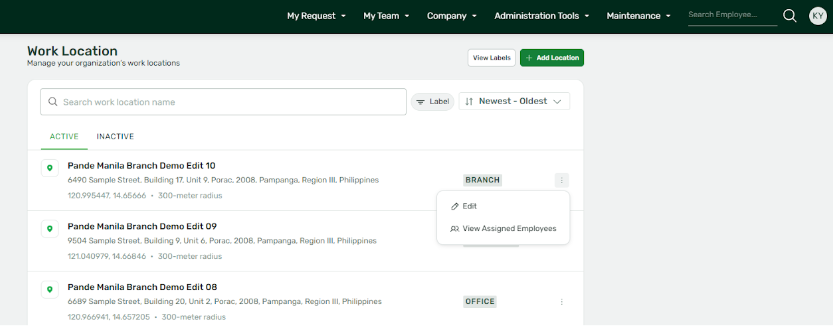
- For each location, you will see the three dots on the right. Select these three dots and press "Edit".
- Once you press “Edit”, you will see the same modal used to add locations. You may edit any of the fields.
- Once you have made your changes, press the Save button.
- Your changes will now reflect in the Work Locations module.
Adding and Editing a New Label
- On the top right portion of the module, select "View Labels".
- A sidebar on the right will pop out, displaying a list of your current Labels. By default, the labels Branch, Warehouse, and Office are automatically created. You may rename these labels as you wish.
- To edit these labels, select "Edit" in the sidebar.
- You may now rename the labels as you wish.
- To add a new label, select "Edit" in the sidebar and scroll to the bottom to find the "Add Label" button. Select this button and input your new label.
- Once you have made your changes, press "Save Changes".
- You will now be able to use these new labels to filter your Locations or to tag your Locations.
Frequently Asked Questions (FAQs)
-
Is there a limit to the number of locations and labels I can input?
No, there is no limit. However, please be aware that we currently do not have the capability to delete labels and to deactivate locations.
-
How is this module different from the old Locations module?
This module will have more fields to track your data such as Address. By adding these fields, it will be easier to auto populate the Longitude and Latitude data. All data from this module will be synced to the old Locations module.
-
How can I view which employees are tagged in each location?
Similar to the current set-up, you may use the Employee List Report to check which employees are assigned under which Designated Work Location. Additionally, in this module, when you select "View Employees Assigned" in the three dots menu, you may view all active employees assigned to each location.
-
Can I sort these locations alphabetically?
Yes! In this new module, you can sort locations alphabetically, from oldest to newest, or newest to oldest. Simply use the filters in the top portion of the module.
Want real-time responses? Explore Sprout Info, your 24/7 guide for product inquiries!